
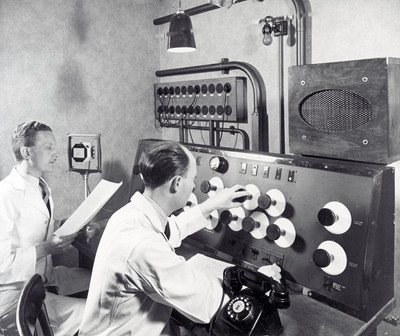
Often misunderstood and shrouded in mystery, the role of the mastering engineer has changed so much over the years. In the early days, there were no specialized roles—technicians in lab coats oversaw the entire process, recordings were created by a single microphone and cut directly into wax or acetate. As the technology changed these technicians eventually became responsible for not only transferring audio recordings from one format to another, but also for improving the fidelity. As engineers made more and more creative decisions, the term “transfer engineer” eventually gave way to “recording”, “mixing” and “mastering” engineers.
With the advent of digital technology and the rise of the home studio, the roles have shifted again, and with the exception of all but the highest budget productions, we now commonly see the artist acting as producer, mixer, recording engineer and performer.
So do we still need a Mastering Engineer?
Being the final step in the process, mastering is often seen as a dark art which is reserved for those who have been training their ears for years. It’s the last chance to make sure there are no errors or technical issues with your track before releasing it to the world. It’s also the mastering engineer’s job to make sure your track sounds good no matter what system it’s being played on—from tiny speakers in laptops and phones to massive sound systems in clubs and venues. Unfortunately, this is best achieved in a properly acoustically treated environment using quality speakers which can cost tens of thousands of pounds!
So there’s no substitute for an experienced mastering engineer, but many of us can’t afford one. Home mastering will never quite be the same, but learning the basics and training your ears to these processes will only improve your mixes and work as a whole!
DIY – How to see the forest for the trees!
Most professionals will tell you that you should never mix and master your own music – a big part of this is objectivity. By the time the mastering stage is reached it’s more than likely you’ve got as far as you can go and are unable to tell what’s wrong with your mix anymore. Your ears easily get tired and the first thing to do is take a break! (put some distance between the two processes!)
There’s a whole breadth of tools and hybrid processors at your disposal but for the most part you’ll be using EQ, Compression and Limiting. Stick with these, you can do everything you need with them and jumping straight to fancy multiband effects and mid-side processing before mastering the basics (excuse the pun) is a sure fire way to destroy your work!
You can try these techniques out using free software on even the most basic of DAW’s by installing these three plugins on a stereo track.
Having a separate set of meters is highly recommended, paying strict attention to both peak and average loudness levels! I recommend working backwards.
First: Know Your Limits

Limiting is the final process in mastering. Its primary purpose is to make your track as loud as possible without clipping or distortion. If you bring up the overall level without one, the audio peaks are going to start causing you problems. A limiter allows you to bring up the level without allowing the peaks to clip.
When you start by using a limiter, you get a sense of the potential earlier in the process. This impacts your choices down the line, giving you a structure to work within. If you’re limiting straight away, you may hit the limiter too hard, but now you can use the other tools at your disposal and slowly ease off to avoid distorted artefacts.
If you hear level disparities between what you’re working on and the other tracks you’re trying to get to sit together, you can nudge the levels on your limiter at this stage until they are as even as possible.
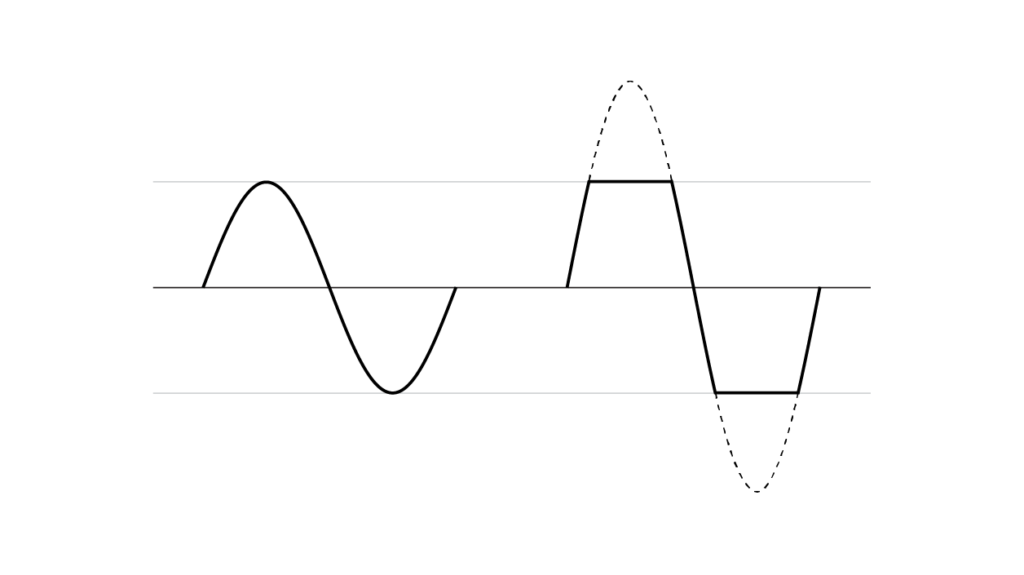
Although limiters and compressors both work by reducing loud signals, the amount of gain reduction applied by a limiter is determined by an output ceiling control. This sets the ‘limit’ above which the level of the audio passing through cannot be exceeded.
Threshold determines when limiting begins, while output ceiling specifies how much limiting is applied. When the threshold is low, even relatively low-level signals will undergo gain reduction, while a high threshold will be more measured. Regardless of threshold, lowering the output ceiling always causes more gain reduction. The release control determines how quickly the limiter stops working after the signal drops below the threshold. If it is overly long, you will hear a pumping effect, while if it is too short, distortion may result. Many limiters offer an auto-release option, when starting out this will provide you with the best results.
Start by setting the output ceiling to -0.2 dBFS and move the threshold around until you see a gain reduction of about 1 to 3 dB, which is really as high as you want to go in most instances. Any more than that and you’ll likely end up with sonic artefacts which aren’t worth the extra volume. Then after you’ve worked on shaping your master using EQ come back to your output ceiling and change accordingly.
Limiters are much more aggressive than compressors and are therefore capable of doing more damage. As with every other process, less is more. When you start applying limiting, you may feel at first that you have improved things by increasing the apparent loudness, but make sure that you haven’t sucked all the life out of the track in doing so.
Louder is not always better. The goal should be to apply light limiting that allows you a little more gain, without sucking out the energy.
Second: The Big Squeeze!

Unlike Limiting, which sets a threshold above which the level cannot be exceeded, a compressor is used to reduce a signal’s dynamic range—that is, to reduce the difference between the loudest and quietest parts.
When used correctly, compression can make a recording sound fuller and more energetic, plus it can help ensure that the various sections flow well into one another. But perhaps most importantly, compression can act as the “glue” that ties everything together.
Threshold determines when compression begins, while the ratio specifies how much is applied. These two controls are highly interactive. A low threshold with a high ratio will cause lots of compression and result in a sound that is squashed and lifeless, generally a high threshold and low ratio will yield the kind of transparency you want during mastering.
For a smoother and more musical handling of compression, you can set a soft knee, where compression turns on gradually as signals approach the threshold and then pass it.
The attack time is the amount of time the compressor will go from zero to full compression based on the ratio and threshold settings. The release time determines how long it takes for the compressor to stop.
If your attack is too short it can squash too much of the percussive transients that give the music its impact. But, too long and you’re not really catching anything. Release is a little trickier. Too short and you’ll end up with a pumping effect; too long and the compressor will rarely if ever return to its zero. The sweet spot occurs when the release time complements the attack. Improper use can take an exciting sound and smother it to death, but when you get it right however, your compressor works almost invisibly!
A fair amount of compression may have been used prior to the mastering, so you probably don’t need to add much if indeed any. Don’t just use compression for the sake of it – be sure it has a purpose.
The idea is to feel rather than hear any compression being applied.
Finally: EQ (Equalization)

When it comes down to it, the equalizer is easily the most important signal processor in any audio engineer’s toolkit. As the mastering engineer, your goal is to enhance the unique qualities about a mix, rather than morph the mix into an entirely different sound allowing it to shine across all sorts of listening environments.
Your job now is to control the frequencies in an audio signal by boosting (additive EQ) and cutting (subtractive EQ) across the spectrum. To do this properly, we need to understand how all the different types of equalizers work.
Generally speaking, an equalizer is a collection of filters that change the tone, or timbre of your audio by amplifying or attenuating a range of frequencies. High-pass filters, cut all the frequencies below a selected point, allowing the highs to pass through. Alternatively, low-pass filters block frequencies above a selected point. The slope of these filters is the transition between the filtered frequencies and the passed frequencies. A Shelf (shelving) filter is used to boost or cut all the frequency content above or below a specified frequency. Allowing you to boost or cut when you want to change how strong the high or low end and Peak (bell-shaped) filter is used to effect specific frequency bands.
Despite its simple function, EQ takes a lot of practice to be able to pinpoint problematic frequencies and make the necessary changes. But it all comes down to three controls: the Frequency you want to manipulate, (Gain) how much of the selected frequency you want to boost or cut and the (Q) shape of the EQ curve, from narrow to wide.
The Q (or bandwidth) functions the same for both shelves and bells: it affects either the slope or width of the EQ shape. A narrow Q is useful for removing undesirable tones, whereas a wider Q is generally used for tonal shaping, allowing for a more subtle effect. Gentle boosts add size and gentle cuts can remove muddiness.
For the purpose of Mastering, a Fully-parametric Stereo EQ using multiple filter types is used allowing for advanced shaping. If working on a computer I’d recommended using one that has Linear-phase for a more natural effect.

Equalizers, like many things, can be a deep subject. First try to figure out where there is too much of something. Are you correcting an issue? Or looking to enhance something else? Being able to hear problems in a mix, like a stuffy mid-range or sibilant vocals and cymbals is easier than finding the specific frequencies but practice can quickly lead you towards instinct.
You do this, as a rule, by implementing very subtle moves—a 1 dB cut here, a subtle boost there, and so on.
The smallest touch of EQ can make a substantial difference, boosting frequencies might not always be the most transparent solution. Though it might seem counterintuitive at first, thoughtfully shaping the low end using subtractive EQ helps to achieve energy, clarity, and impact without drastically altering the original sound.
The advantages of using subtractive EQ extends beyond just shaping frequencies. Besides helping to sculpt the overall tonal balance, applying the desired equalization also improves the performance of your compressor.
The next step is to determine what there needs to be more of. Wide, but gentle boosts are the default when enhancing a selection of frequencies. Take a second to critically listen — this gives you a sense of purpose rather than just cranking up gain for the sake of it.
There should be a feeling the mix has opened up without losing its edge. You can make a track sound clearer and have more definition
Good mastering comes down to good decisions and not just having a particular piece of equipment or software. Knowing how and when to use your tools is the essence of mastering. Amazing results are achievable with simple tools if you know what you’re doing. Likewise, you could have the best tools available, but if you don’t know how to use them you won’t produce good resu
You don’t need ‘golden ears’
Nail your gain structure, have some restraint but most of all have some fun!
Recommended Resources
A great interview on mastering with Rashad Becker – https://roberthenke.com/interviews/mastering.html
Another great interview with Mandy Parnell – https://musictech.com/features/mandy-parnell-interview/
A really good series of video tutorials on mastering.
About the Author

Sam Weaver (Auto-Canibalism) is a sound artist using the studio as a laboratory for sonic investigation, often re-routing instruments into abstraction and deliberately mis-using his equipment: Primarily a custom built Hordijk analogue modular synthesizer. One half of London outfit Hungryghost, Sam has recorded and performed with Charles Hayward, Miki Yui, Clive Bell, Otto Wilberg, Rachel Goodyear, Konstrukt & Kevin Drumm. His performances exist somewhere in between acousmatic music, free improvisation and experimental electronics, seeking to explore the dynamics between harmony and chaos. https://soundcloud.com/flagdayrecordings/various-artists-sam-weaver-auto-cannibalism He runs the electroacoustic imprint Cuspeditions, is the co-curator of a bi-monthly concert series Eroteme and is one of three directors facilitating ‘Sine’s & Squares’ festival in association with NOVARS Research Center, (University of Manchester).